Business Card Scanner Guide

← Back to App

1 Add Web to iOS/Android Devices

For iOS:

Go Safari > Visit the Business Card Scanner web > Click ... > Share > Add to Home screen > Add > Find the APP icon at Home

Setup iOS Screenshot1 Setup iOS Screenshot2 Setup iOS Screenshot3

For Android:

Go Chrome > Visit the Business Card Scanner web > Click ... > Add to Home screen > Install > Find the APP icon at Home

Setup Android Screenshot1 Setup Android Screenshot2

2 Initial Setup & Login

Before using the business card scanner, please complete the basic information setup:

Initial Setup Screenshot
  1. Select Team & Event: After entering the system, select your team from the dropdown menu (e.g., USA Team) and the current event name (e.g., TestEvent 2026).
  2. Enter Username: Input your name in the designated field (e.g., Jack).
  3. Save Settings: After confirming the information is correct, click the "Save >" button to enter the scanning interface.

3 Business Card Scanning & Recognition

After entering the scanning interface, you can start collecting customer business card information:

Business Card Scanning Screenshot
  1. Activate Camera: Click the "Camera" button at the bottom to take a photo of the business card.
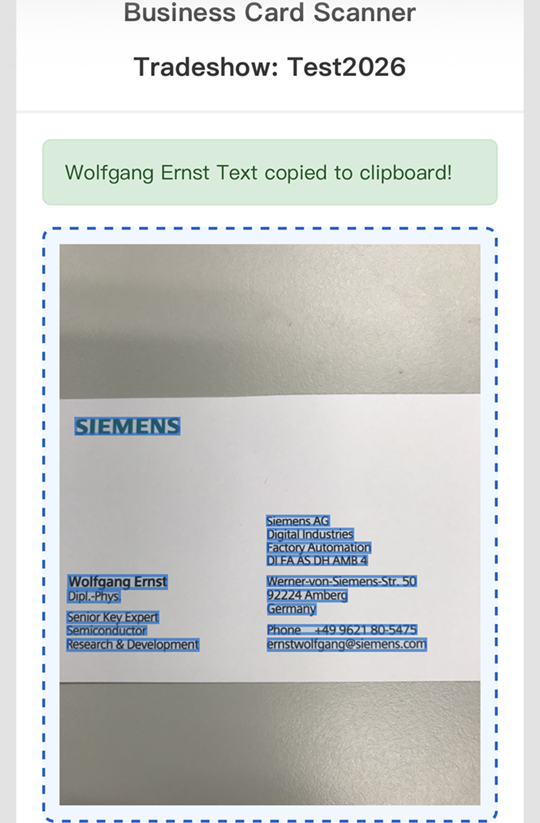
  2. Automatic Recognition: The system will automatically recognize text on the business card (such as name, company, phone, etc.), and the recognized text will be highlighted in blue blocks on the image.
  3. Copy Information: You can click on the blue blocks. When the system displays "Text copied to clipboard!", it means the text has been successfully extracted and you can paste it into the corresponding field.
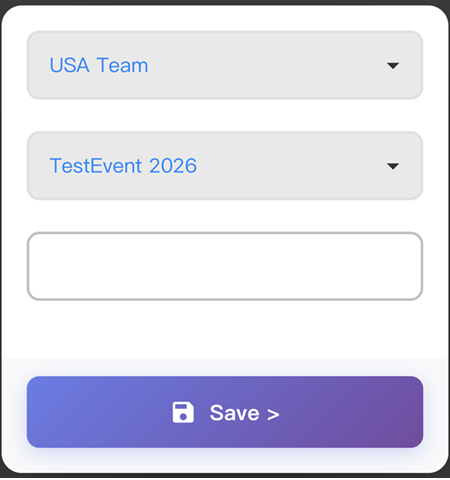
  4. Fill in Notes: In the Note field, you can manually input additional information about the contact or key discussion points.
💡 Tip: For best OCR results, ensure good lighting and place the card flat on a dark background.

4 Data Saving

For each scanned business card, you can record details:

Data Saving Screenshot
  1. Save Single Entry: Click the "Save" button to temporarily store the currently scanned business card and notes on your device.
  2. Sync to Cloud: Click the "Sync to Cloud (n)" button to upload all locally saved business cards to the cloud. The number in parentheses shows how many cards are pending synchronization.
  3. Reset App: If you need to clear all data and settings during use, click the "Reset App" button to clear all saved business card data and restore to initial state.
  4. History: Click the "History" button to view all previously saved business cards and their details.
⚠️ Important: The app works offline. Data is saved locally and can be synced to cloud later.

5 Cloud Data Synchronization

To ensure data security and consolidation to the cloud, be sure to execute the sync function:

  1. Activate Sync: Click the gray "Sync to Cloud (n)" button, where the number in parentheses represents the current number of unsynced business cards.
  2. Confirm Sync Status: During synchronization, the system will display "Syncing...".
  3. Sync Complete: When the "Sync Complete!" window appears, it will show the number of successful, failed, and total cards. Seeing "All data successfully synced to Cloud!" indicates data has been uploaded successfully.
  4. Cloud Data Synchronization Screenshot
✅ Best Practice: Sync every 5-10 cards to prevent data loss. Always sync before leaving the venue.

6 Export Data to Excel (Admin)

Users with administrative privileges can export all collected business card data as an Excel file.

Download Confirmation Screenshot
  1. Admin Login: admin mode access is required, select a specific administrator account and enter the TSID (e.g., LA0001) to log in.
  2. Download Excel: In the admin interface, click the green "Download Excel" button. The system will export an Excel file. (e.g., 202601261056_exhibition_cards.xlsx)
  3. View & Share File:
    • View the list of downloaded files through the browser's "Downloads" feature.
    • After opening the file, you can view the report containing detailed data such as name, job title, company, phone, email, etc.
    • You can use your phone's share function to select "Save to Files" or send the file via AirDrop or email.
    • Download Confirmation Screenshot Download Confirmation Screenshot Download Confirmation Screenshot